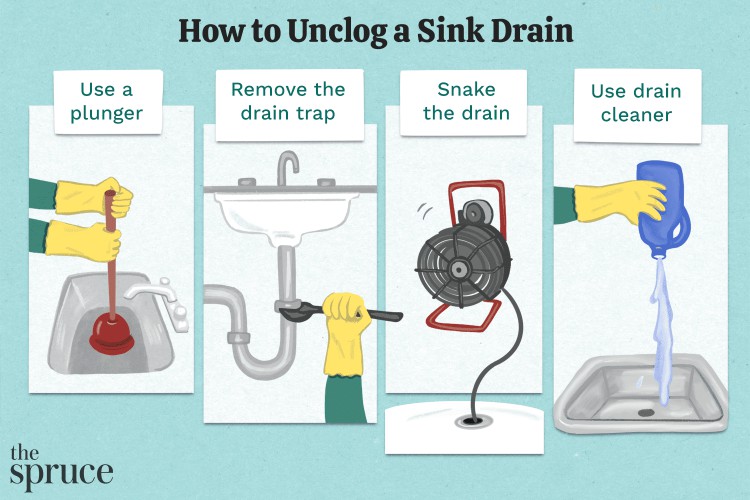
A blocked kitchen or bathroom sink full of water can feel like a nightmare, but luckily, clogs can usually be cleared with DIY methods.
Soap scum, hair, and food scraps are some of the most common reasons for clogs, and depending on the cause and severity, there are multiple ways to unclog a sink drain— from plungers to solutions made of pantry staples. If you're facing a clogged sink, read on for eight easy fixes to try.
The Spruce / Hilary Allison
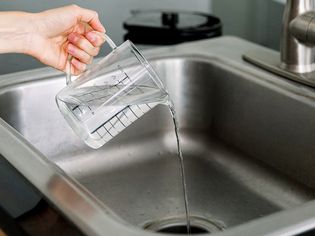
Boiling Water
Most clogs in sinks and tubs are due to a combination of hair, grease, soap residue, and tepid water sitting in the waste trap right below a drain's opening. If you have metal pipes, start by boiling a gallon of water and pouring it slowly and carefully down the drain to help dissolve built-up soap scum and grease.
Warning
Take care not to pour boiling water directly into a porcelain sink, but only down the drain. And do not use boiling water if you have plastic (PVC) pipes, because water hotter than 140 degrees Fahrenheit can soften and damage them— use a plunger to clear clogs in plastic pipes instead.
The Spruce / Ana Cadena
Baking Soda and Vinegar
If you have plastic piping or boiling water isn't effective enough, pouring half a cup of baking soda and half a cup of vinegar down the drain can clear minor clogs from soap residue and toothpaste. Make sure to remove any standing water in the sink before you start, place a cloth or plug over the drain for 30 to 60 minutes while the reaction takes place, and flush with hot or boiling water afterwards. You can repeat this process if necessary until the sink drains.
Baking Soda and Salt
Creating a solution of baking soda, salt, and water can also be an excellent remedy for grease clogs. Start by mixing equal parts baking soda and salt with four parts of boiling water, then pour the solution directly down the drain. Leave the sink for several hours or overnight, and flush your drain with hot water the next morning.
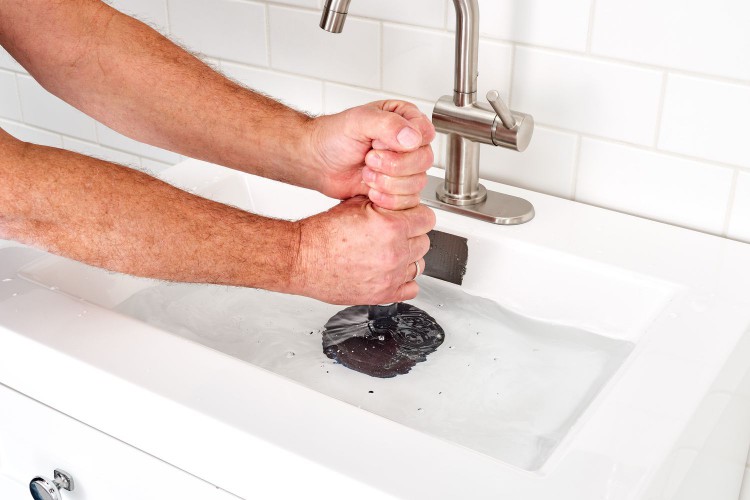
Plunger
The Spruce / Kevin Norris
If flushing the drain doesn't work, it's time to try a cup plunger. Start by sealing the sink's overflow opening with duct tape or a damp rag, then remove the basket strainer or stopper from the sink's drain.
Fill the sink with several inches of water, place the plunger over the drain opening—making sure it has a good seal—then, use an up-and-down motion for several plunges. The pressure created can cause the duct tape seal to loosen, so you may need to also keep a hand on the overflow opening.
Let the faucet run for a minute or two after the drain is clear, then remove the duct tape and replace the drain stopper or sink basket.
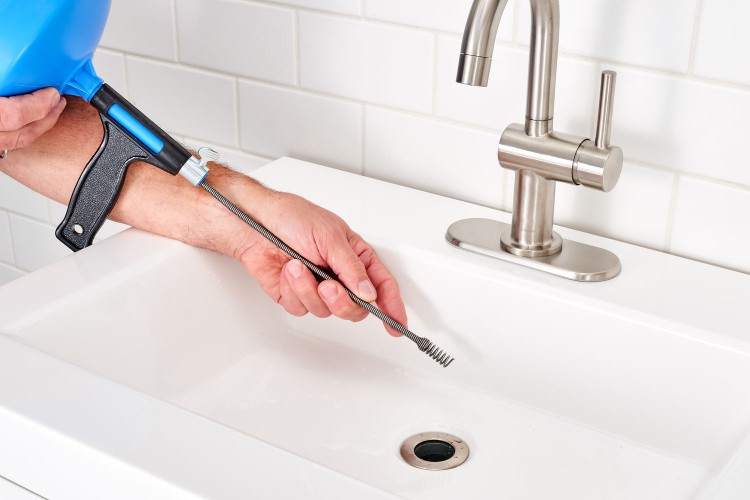
Sink Auger
The Spruce / Kevin Norris
If a plunger doesn't work or the clog is in your sink's trap, try a sink auger (also known as a drain-cleaning snake.) Start by removing the stopper, then extend the auger cable into the drain opening. Once you feel it hit the clog, pull out at least 12 inches of cable and tighten the auger's setscrew.
Rotate the auger's handle clockwise while applying moderate pressure on the cable, turning the cable if it gets stuck on the clog or bends in the pipe. Extend more cable until you feel the clog give way, then pull the cable out of the pipe, pushing it back into the canister as you go.
The cable may come out of the drain with a large clump of hair, so repeat the process as needed until the auger comes out clear, then flush with hot water from the sink's faucet.
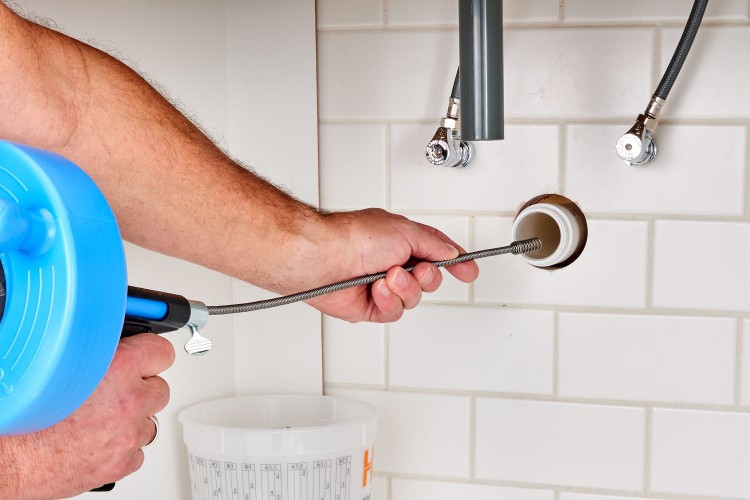
P-Trap Cleaning
The Spruce / Kevin Norris
If you extend the cable of a sink auger all the way through the trap without contacting a clog, the issue is likely further down in the branch drain or vertical drain stack. To access these pipes, you'll need to remove the drain trap.
First, place a bucket under the trap to catch the water that will come out when it's removed, and loosen the slip nuts at each end of the trap with tongue-and-groove pliers or a pipe wrench. Remove the slip-nuts, the trap pipe, and nylon washers, then dump the water from the trap into the bucket.
Insert the auger cable into the horizontal section of the drainpipe, following the same steps as before. Apply pressure as needed, and work the cable into the drain until you push through the clog. Reassemble the trap, and flush with hot water to clear any remaining debris.
Drain Cleaners
If all else fails and you want to use a drain cleaner, follow the instructions on the cleaner of your choice for best results.
Wet Dry Vacuum
A wet dry vacuum is another surprisingly simple way of unclogging drain, working like a plunger with more power and suction. After removing the drain stopper, cover the opening of the drain and overflow with damp cloths.
Next, seal the hose of the vacuum against the drain, start the vacuum, and listen for changes in sound. Switch to suction after 15 seconds if there is no change, then switch back to the exhaust setting. Flush the drain with water afterwards to check the sink is clear.
When to Call a Professional
Severe clogs may not clear, even with all of these DIY methods. If that's the case, or if you continue to notice slow drainage, it's best to call a licensed plumber to fix the problem. It's also important to call a pro for any foul odors emitting from the drain, as these could be a sign of longstanding buildups that will continue to block the water and cause damage to your home's plumbing system.
- Why is my clogged sink worse after plunging?
Plunging a sink with too much force can cause the clog to get stuck further down the pipes instead of dislodging it. Make sure your plunging motions are precise and gentle, and avoid moving too quickly.
Can you pour boiling water down the drain?Boiling water is an effective option as long as you have metal pipes. For PVC pipes it's best to use other methods that won't compromise the structural integrity of the plastic material.
Can you pour bleach down the drain?It's not recommended to use any kind of bleach solution down a drain. Bleach can react inside your pipes and corrode them leading to eventual cracks or bursts.
Recommended Articles
 PAINTING
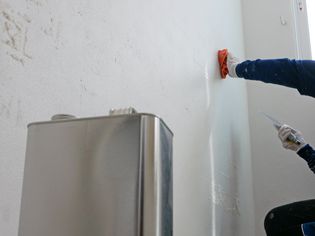
How to Use Paint Thinner
Paint thinner is a broad term defining numerous solvents designed to thin or remove paint from brushes, rollers, and other tools. Examples of paint thinners include turpentine, acetone, naphtha, miner
ROOM-DESIGN-AND-DECORATINGIf You're Still Doing This in Your Kitchen, Designers Say It Will Always Look Cluttered
Key Points Keep counters clear by only displaying essential appliances for a clean, minimalist look.Use smart storage like appliance garages, hidden outlets, and bar carts to reduce clutter.Declutter
INTERIOR-REMODEL-AND-REPAIR9 Original Details You Need to Save During a Reno, According to Pros
As someone currently in the throes of a historic home renovation, I know firsthand that some details should be saved, protected, and, if necessary, refurbished. But how do you know which decorative ac
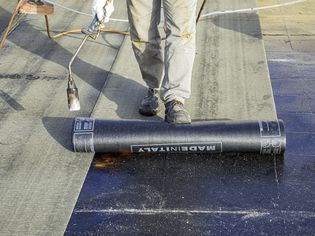
HOME-IMPROVEMENTRolled Roofing: Basics, Costs, & Self-Installation
Rolled roofing, also known as MSR, is a budget-friendly and simple-to-install roofing material frequently used for sheds and carports. Unlike composite (asphalt) shingles, which are individual pieces,
HOME-IMPROVEMENTHow to Pull Off a Live-in Renovation
Let’s face it: undergoing a renovation while living at home is no easy feat. Of course, it’s exciting to finally see your space as you envision it. However, there are the inevitable loud noises, lengt
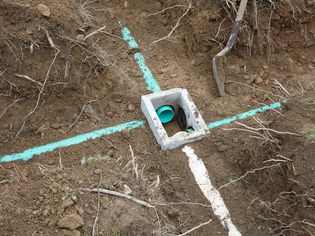
EXTERIOR-REMODEL-AND-REPAIRWhat Are Leach Lines, and When Should They Be Replaced?
If your home has a septic system, it has leach lines or a leach field. An essential component of all onsite wastewater systems, leach lines are the last step in a process that starts at your sink or t
BATHROOM-REMODEL-AND-REPAIRI Can’t Afford a Bathroom Remodel, So Here Are 4 Ways I’m Making It Work
After years and years of living in rentals and apartments, my husband and I finally bought our first home this year. And while there are plenty of little projects to do around the house—painting, upda
KITCHEN-REMODEL-AND-REPAIRA Beginner's Guide to DIY Kitchen Remodeling on a Budget
If a full kitchen remodel is giving you sticker shock, a DIY kitchen remodel could be the trick to bring down your costs. The average DIY kitchen remodel comes in at $20,000, and it is a great way to