The process of fence staining may seem daunting, but it doesn't have to be. Even if you're new to painting and staining, you can give your fence a brand-new look in just one weekend. Whether you want a transparent stain that preserves the beauty of the wood or you prefer a dark stain that transforms your fence's look, staining a fence yourself is a great way to save money and protect your investment.
Below, we've explained how to stain a fence quickly like a pro and offered tips for getting the job done right.
Before You Begin
Staining a fence is a great project for beginner DIYers, as there's a lot of room for error. Unlike staining floors or painting your house's interior, staining a fence isn't a high-precision job.
As long as you choose the right tools, perform the necessary prep work, and complete any necessary repairs beforehand, you'll be shocked at how smoothly the project goes.
Want more home reno project tips and inspiration? Sign up for our free daily newsletter for the latest how-tos, reno guides, and more!
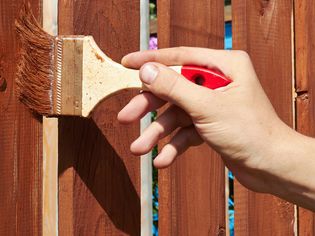
Sprayer vs. Roller and Brush
While you can apply stain with a roller and brush, a sprayer makes staining a fence dramatically quicker. Plus, sprayers make applying an even coat of stain an effortless task.
Some fence stains are designed to be used in a manual pump-style sprayer, while others are to be used in an airless sprayer, much like paint.
Prepping a Fence for Stain
Before you apply stain to a wood fence, make sure you clean it thoroughly. The best way to clean a dingy wood fence is with a pressure washer, but make sure to keep your distance and opt for a pressure washer nozzle with a high angle. After pressure washing, plan on giving your fence a few hours to completely dry before you apply stain.
How to Stain a Fence
Follow these steps to prep and stain your wood fence.
- Remove any brush and debris. The more accessible your fence is, the easier it is to properly prep it and stain it.
- Clean the fence. Using a pressure washer with a lightly aggressive nozzle, remove all dirt, grit, and grime from the fence. If necessary, employ a mild detergent or bleach solution to remove mold, mildew, and any other stubborn grime.
- Let the fence dry. Wood soaks up a lot of water, so give your fence ample time to dry after pressure washing it. If the fence is in the shade, it will take much longer to dry than if it's in the sun.
- Assess and repair any damage. There's no reason to stain damaged or rotting wood. While the wood is clean and you can get a good look at it, inspect all boards to ensure there's no damage. Replace rotten boards and fill any holes using exterior-grade wood filler before applying fence stain.
- Mix your stain. Thoroughly mix your stain according to the manufacturer's instructions. Many stains specify that you should gently stir them rather than shake them, as shaking can cause excessive bubbling.
- Load your sprayer. Fill your sprayer with stain and test it on a scrap piece of wood or cardboard. Keep an even distance and move steadily and consistently. Make any necessary adjustments to the sprayer before staining the fence.
- Stain the Fence. Once you feel comfortable with the sprayer, begin staining the fence. With each pass, overlap the last pass to keep a wet edge. If the stain is puddling, you're either too close or moving too slowly. Adjust your speed and distance to apply a light, even coat on the wood.
- Let the stain dry. Stain will likely dry quickly on a fence, as it's outdoors in the open air. However, you should still pay close attention to your manufacturer's specified dry times before applying a second coat or an additional sealer.
How Long Does Stain Last on a Fence?
Wood stain will last three to five years on a fence. Restaining every five years will protect the wood, but restaining every three years will keep the fence looking its best.
Fence Staining Tips
- Clean your fence thoroughly for proper stain penetration.
- Let the fence fully dry before staining.
- Applying multiple light coats of stain is better than one heavy coat.
- Look for a stain with a built-in sealer to offer more protection to your fence.
- Use a dark stain to blend the look of mismatched boards.
- Check the forecast to ensure the temperatures are mild and no rain is coming.
- Apply the stain evenly and consistently to ensure the fence looks the same from start to finish.
- Spend a few more dollars on a high-quality fence stain for long-lasting coverage.
- What is the best way to stain a fence?
The best way to stain a fence is to use a paint sprayer. Sprayers allow you to apply an even coat of stain on a fence immensely faster than you could with a roller and brush.
How much does it cost to stain a fence?The average cost to stain a fence is $1,700, but you can save 60% by skipping the call to a paint professional and staining the fence yourself. Furthermore, the cost of staining a fence varies drastically depending on the size and style of the fence. Large privacy fences require much more stain than small rail-style fences.
Do you need to prep a fence before staining?It's crucial to prep a fence before staining. Failing to remove the gunk and grime that tends to build up on wooden fences before applying stain will cause the stain to poorly penetrate the wood's surface. While the finish may look good immediately after application, it will soon fail, leaving you with a mess and an unsightly fence.
Recommended Articles
 PAINTING
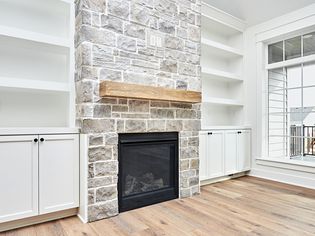
How to Whitewash a Stone Fireplace for an Easy DIY Makeover
Want a fresh look for your stone fireplace without the expense of hiring a mason? A coat or two of whitewash can do the trick. While regular white paint—or any color, for that matter—would also work,
PAINTINGSatin Paint vs. Matte Paint: What's the Difference?
Choosing satin paint vs. matte paint will yield very different results, but what is it that differentiates these two popular paint sheens? Even the exact same paint color can take on totally different
HOME-DESIGN-STYLESWhat Is a Duplex?
Perhaps you've seen the term duplex home used in a real estate listing or mentioned on a home remodeling show, but aren't quite sure what exactly it refers to. We're here to explain what it is, what t
INTERIOR-REMODEL-AND-REPAIRWhen Moving Isn't an Option, How to Turn Your Old Home Into Your Dream Home
If you've been unable to size up from your current home, you're not alone—according to a paper published by the National Bureau of Economic Research, there were 800,000 fewer moves in 2023 than the ye
HOME-IMPROVEMENTWhat’s the Difference Between 3 Prong vs 4 Prong Dryer Outlets?
Electric dryers require a lot of energy and operate on 240V current, which is double the power of a standard wall outlet. In newer homes, these dryers connect to four-prong plugs designed for 240V out
BATHROOM-REMODEL-AND-REPAIRBathroom Rough-In Plumbing Dimensions
Often, the hardest part about installing plumbing in a bathroom is the rough-in stage. There are generally accepted plumbing rough-in measurements for sinks, toilets, bathtubs, and showers. In additio
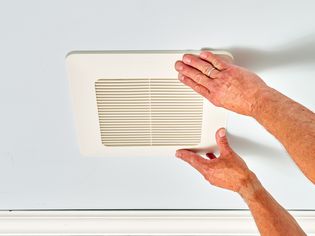
BATHROOM-REMODEL-AND-REPAIRHow to Choose the Best Quiet Bathroom Exhaust Fan
Without adequate ventilation, your bathroom is at risk for long-term damage to walls, ceiling, flooring, and trim from mold, mildew, and rot. But choosing a bathroom exhaust fan often presents a parad
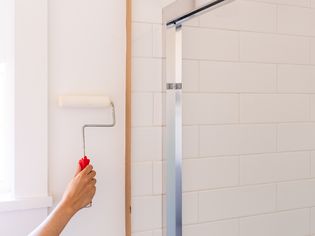
BATHROOM-REMODEL-AND-REPAIRHow to Choose the Best Paint for Bathroom Walls, Ceilings, Trim, and Cabinets
The best paint for bathrooms addresses the room's wet and overly humid conditions, prevents mold growth, resists mildew, and remains attractive for the long term. The best way to do this is to start w